Skip to content
Home » filament

filament

Visit Tacticalware.com for information related to this tag and others. We look forward to assisting in your tech projects with our in-depth knowledgebase…

PETG – JAMMING HOTEND, BRITTLE LAYERS AND BREAKS EASILY [SOLVED]


Let’s start here…some PETG prints were amazing…clips, guides, knobs, just about anything without a long flat layer that had infill.

Then began my struggle (see the image below)


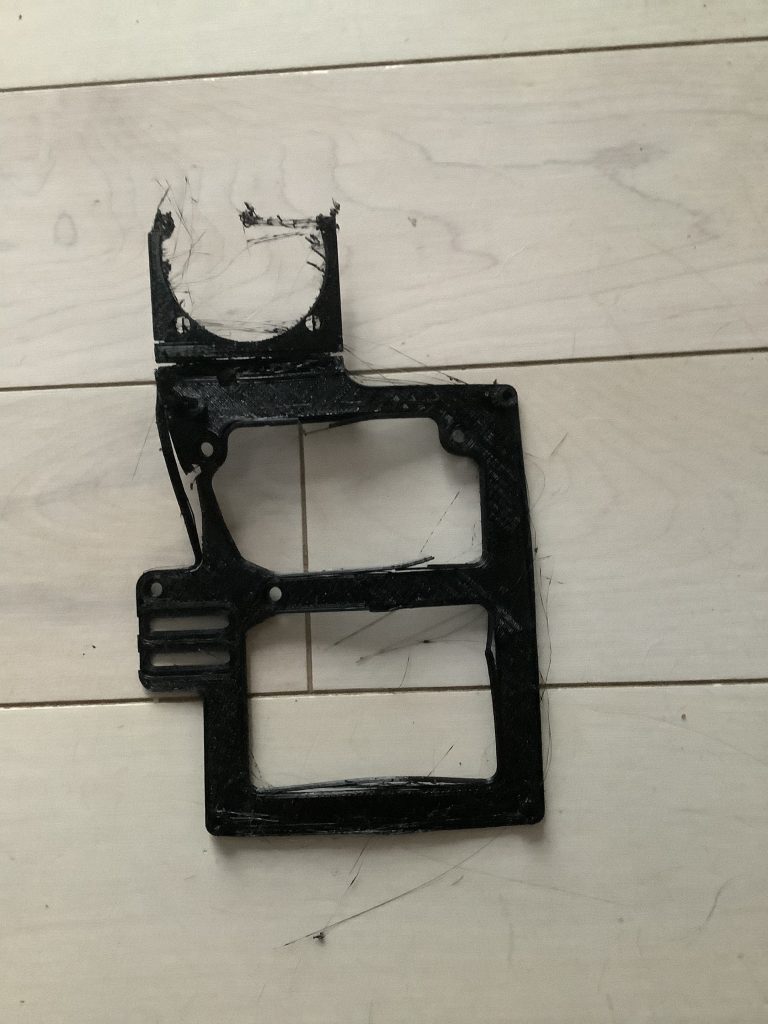
After meticulously dialing in my system, running retraction tests, heat towers, extrusion stepper modifications, extrusion multipliers, drying out filament and many many other steps to prep my system for a successful run with PETG prints…. My hotend kept jamming or under extruding, the extruder would click and click, and my prints were terrible.

After it would finish printing, it would break apart by simply touching it….

The solution to this…..

Open Simplify3D

Modify the FFF process

Go to the cooling tab

Set cooling on Layer 1 to 0

Remove all other setpoints

Uncheck the box that says Increase fan speed for layers below

Save, reslice and reprint

The result…

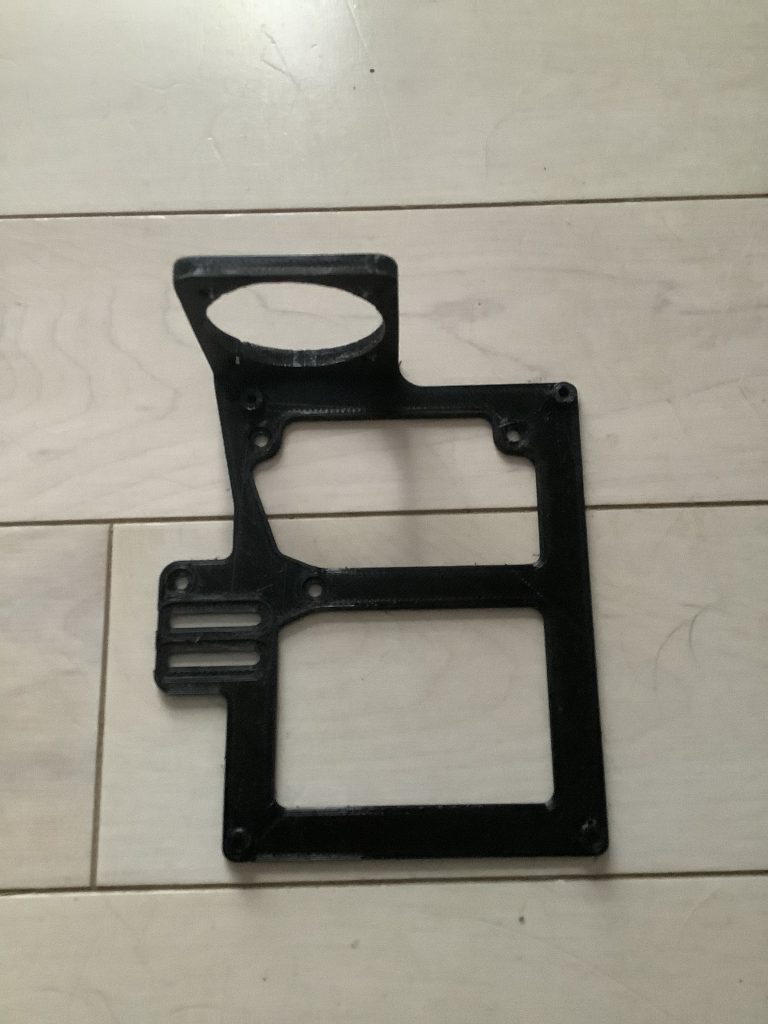
A solid print in PETG

PETG loves heat….and is ruined with cooling

Now It’s time for me to go back around and reconfigure my system with the extrusion multiplier, speed tests, heat towers, retraction tests….everything

ENDER 3 PRO – UNDER EXTRUSION ISSUE [SOLVED]

To fine tune your Ender 3 Pro you will need to measure the amount of filament that is passing through the machine using the following test, to ensure your settings are correct

First you going to want to disconnect your hotend from the extruder, and place these in an area where you can heat them up and they will not damage themselves or anything around them.

Next you’re going to want to go into the settings of your Ender 3 and click on preheat PLA. This will warm up the hot end and allow you to extrude for our test

Measure out 120mm from entry point on extruder to the spool, and mark it on the filament using a notch or a marker (I prefer a slight notch)

Open Octopi
Go to Terminal Tab
Enter in the following code
G1 E100 F100
Press Send
This will extrude 100mm of filament

Now measure the difference of what went in, verses what is left.
I extruded 90.5mm instead of 100mm, and have 29.5mm left before my notch

Back in Octopi
Terminal Tab
Enter in the following code
M503
Press Send

Search for M92 line and verify it says E93
This is what you will edit

To figure out the new value for E93 do the following
100/90.5*93=102.76
E93 should be E102.76

The values above translate to this
100 – Distance that should have been extruded
/ – divided by
90.5 – is the distance that was extruded
* – Multiplied by
93 – This is the E93 value we saw earlier

Back to Octopi Terminal Tab
Enter in the following
M92 E102.76
Press Send

Enter in the following
M500
Press Send

Your new settings are saved, and your extrusion will be accurate. Feel free to repeat the above steps to ensure your settings are correct and the extrusion works as expected

3D PRINTING – HEAT TOWER

To find out the proper temperature to use with a filament, i highly recommend you print a heat tower for each manufacturer, and color. To setup Simplify3d for this you will need to do the following

First download the heat tower
https://www.thingiverse.com/thing:2223651

Open up the Heat Tower Zip file and we are going to work with the heat tower with bridge for this test

Now open Simplify3D

Import the heat tower in the designated area

Navigate to the Processes area
Edit your Process
Go to the Temperature tab
Navigate to the Temperature Controller List
Select Primary Extruder
In the Per-Layer Temperature Setpoints box you will want to change the following
Layer 1 – Set the temperature to 240
As you add Setpoints, each subsequent layer will be +25 higher and -5 for Temperature. For Example
Layer 1 – Temperature 240
Layer 26 – Temperature 235
Layer 51 – Temperature 230
You will continue on until your last temperature is 190

You can then click OK to save the settings for this print

Slice the print

And send it to your Printer.

Once the print has completed, review which temperature had the best look and feel (no stringing, cleanest lines, etc)

This will now be the temperature you use for this Manufacture with this filament type, and this filament color. Yes each of those 3 things matter. If you change any of them, re-run this test to get the new baseline