This is a quick guide on how to use T-Rex on your Ubuntu 20.04 mining rig to allow your NVidia 1080 Ti cards to run after the epoch. Ethereum Classic has a hardform at Epoch 390 which should fall on or around November 28th 2020. To keep mining afterwards you will have to update your miner to one that supports the new fork. For this, I have chosen to switch over to T-Rex.
On the rig
Open a Terminal
sudo bash
Enter your password
mkdir /tacticalware
cd /tacticalware
If you have Cuda 10 installed, download the following, otherwise find the one for your Cuda version
wget https://github.com/trexminer/T-Rex/releases/download/0.18.11/t-rex-0.18.11-linux-cuda10.0.tar.gz
Once it is downloaded
tar -zxvf t-rex-0.18.11-linux-cuda10.0.tar.gz
cp ETC-2miners.sh tacticalware.sh
nano tacticalware.sh
Now modify the contents of the file. I suggest replacing the mining site, and wallet address. My file looks like this:
./t-rex -a ethash –coin etc -o stratum+tcp://us1-etc.ethermine.org:4444 -u 0xb2bc70cD85e20c96c8967CAECcE20a238ee9950D -w tacticalware –fork-at etchash=epoch:390
Note that there is a double dash before –coin and –fork. Sometimes your browser will show them as a double dash, sometimes it shows as a single long dash. they are double dashes
Save the file
Exit
Now you can launch it by running
./tacticalware.sh
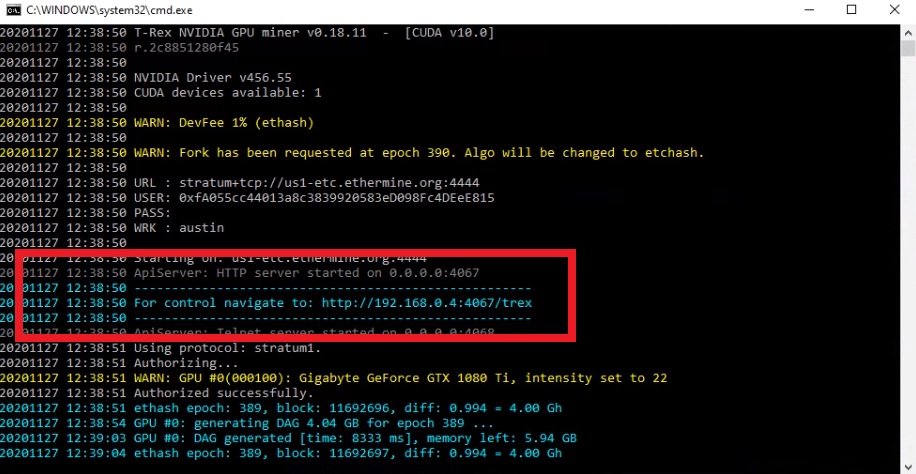
It will begin to mine. To monitor it you can do it through a web browser. Simply look for the address when the miner begins
The address will look something like this, and be displayed right when you begin mining

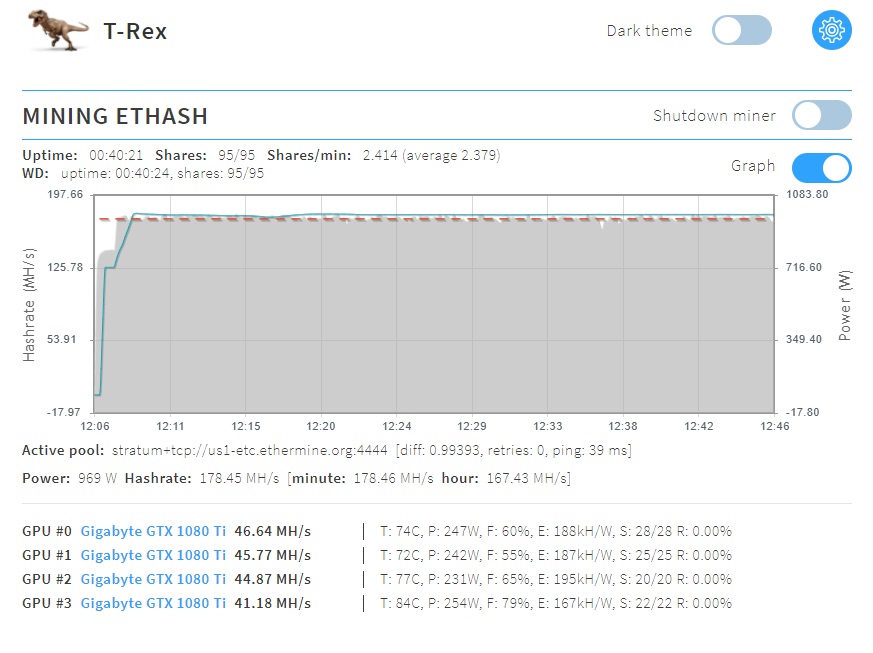
When you browse to that site you will see something that looks like this:

That’t It. You are mining successfully. Thanks for reading
The hardware that I used in this guide:
Gigabyte AORUS GeForce GTX 1080 Ti (QTY 6):
https://amzn.to/2JqvXC8
Motherboard (QTY 1):
https://amzn.to/2JqGJZ7
CPU (QTY 1):
https://amzn.to/3qevp2X
Memory (QTY 1):
https://amzn.to/2JqHn8Z
Hard Drive (QTY 1):
https://amzn.to/3lic3X5
Risers (QTY 6):
https://amzn.to/33rIgVE
Power Supplies (QTY 2):
https://amzn.to/3fTRpLR
Add2PSU (QTY 1):
https://amzn.to/39s4URY
Power Switch (QTY 1):
https://amzn.to/3ljmNVk