Skip to content
Home » Windows 10 » Page 2

Windows 10

Windows 10 Related Information, How-To’s, Tips, Tools, and Guides

DELETE ALL PASSWORDS IN CHROME

This is the continuation of a series of articles, that help you divorce your life from BIG TECH. With the recent events in American Politics, the need for these guides has become apparent. I hope this guide assists in your journey to protect yourself.

Using a password manager is recommended….Allowing google to harvest your passwords…bad idea. This guide will show you how to quickly delete all of your passwords from Chrome, at once.

On a Windows 10 computer
Open Chrome
Press ctrl and h at the same time to show your History
Select Clear Browsing Data from the Menu on the left
You will have two options, Basic and Advanced
Select Advanced
Time Range: All Time
Place a checkmark next to Everything in the list below
Click Clear Data

All of your data and passwords will be erased.

To finish it off, disconnect the Sync option by selecting Turn off sync and personalization

You are well on your way to divorcing yourself from Google

WINDOWS 10 SET DEFAULT BROWSER TO FIREFOX

This is the continuation of a series of articles, that help you divorce your life from BIG TECH. With the recent events in American Politics, the need for these guides has become apparent. I hope this guide assists in your journey to protect yourself.

On your Windows 10 system, and after you have installed and secured Firefox
Go to the Type here to search box
Type in Default Apps and press Enter
The Default Apps window will appear
Scroll down to Web Browser
Click the Icon shown
Select Firefox
Close the window by pressing the X at the top

Your default browser is now Firefox

DISABLE FAST STARTUP IN WINDOWS 10

To disable the Fast Startup feature in Windows 10, perform the following:

Open
Control Panel
System and Security
Power Options
Choose What the Power Button Does

Select Change settings that are currently unavailable

Remove the checkmark next to
Turn On Fast Startup (Recommended)

Then click Save Changes

That’s it! Thanks for reading

FULLY SHUTDOWN WINDOWS 10

Windows 10 has a terrible feature called Fast Boot. Which does not allow your system to fully shutdown, but it allows it to boot up faster. Me, personally, I like a shutdown to clear the memory, and shut the system down completely

To get around this painful feature, you can shut down you computer from the command line

Open a Command Prompt

Type:
shutdown /s /f /t 0

Press Enter

Your system will fully shutdown

Thanks for reading

WINDOWS 10 MINING ETC AFTER EPOCH 390 [NOVEMBER 2020]

This is a quick guide on how to use T-Rex on your Windows 10 computer to allow your NVidia 1080 Ti cards to run after the epoch. Ethereum Classic has a hardform at Epoch 390 which should fall on or around November 28th 2020. To keep mining afterwards you will have to update your miner to one that supports the new fork. For this, I have chosen to switch over to T-Rex.

On my Windows computer:
Open a web browser
Navigate to
https://github.com/trexminer/T-Rex/releases

Download
https://github.com/trexminer/T-Rex/releases/download/0.18.11/t-rex-0.18.11-win-cuda10.0.zip

Unzip t-rex-0.18.11….

Your Antivirus will probably send you a warning, so you will have to create an exception for it.

Now right click on the .bat file you want to run. For me, I will be mining ETC, so I will right click on ETC-2miners.bat

Once the file is open, I will save it as Tacticalware.bat

Next you will want to change the mining pool to whichever one you use. I use ethermine

You will want to modify the wallet address that shows in the file, and replace it with your wallet address

At the end of the changes, my file looks like this:
t-rex.exe -a ethash –coin etc -o stratum+tcp://us1-etc.ethermine.org:4444 -u 0xb2bc70cD85e20c96c8967CAECcE20a238ee9950D -w tacticalware –fork-at etchash=epoch:390

pause


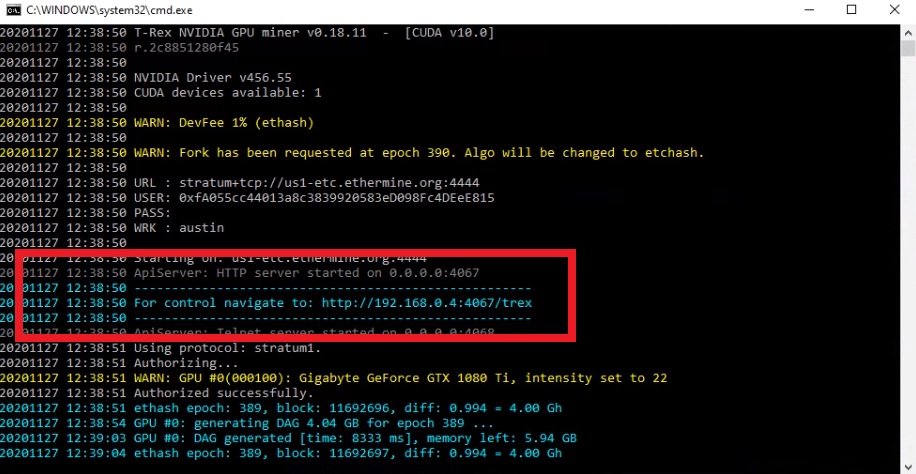
Save the file, and then run it. You can monitor the progress by navigating watching your hashes on the ethermine site, or navigate to the local t-rex site that is created on your computer.

The address will look something like this, and be displayed when you begin mining
t-rex


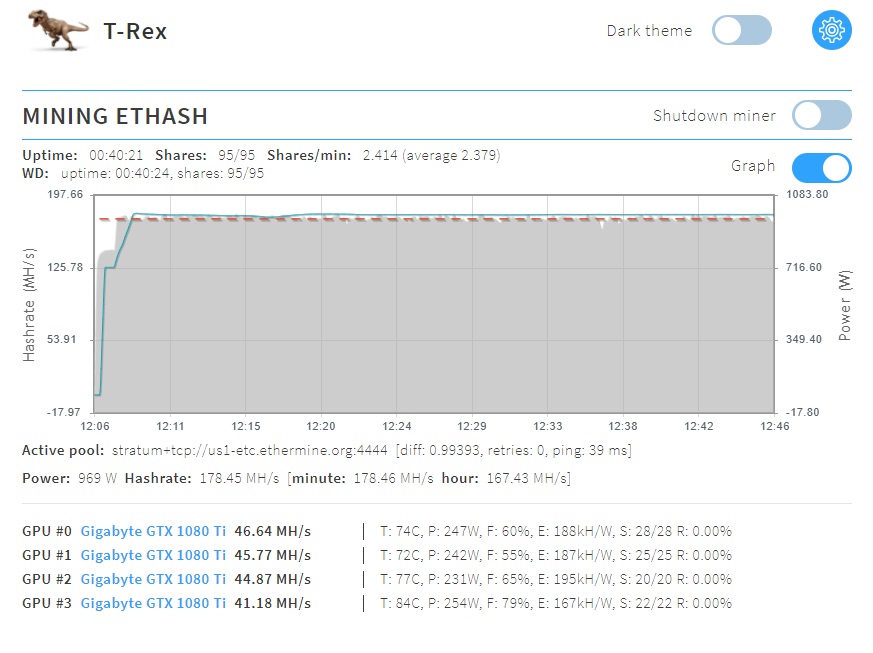
When you browse to that site you will see something that looks like this:

t-rex

You can now monitor your mining rig through a browser

Thanks for reading

The hardware that I used in this guide:
Gigabyte AORUS GeForce GTX 1080 Ti (QTY 4):
https://amzn.to/2JqvXC8

Motherboard (QTY 1): 
https://amzn.to/2JqGJZ7

CPU (QTY 1): 
https://amzn.to/3qevp2X

Memory (QTY 1): 
https://amzn.to/2JqHn8Z

Hard Drive (QTY 1):  
https://amzn.to/3nZ5pH4

Risers (QTY 4):  
https://amzn.to/33rIgVE

Power Supplies (QTY 2):
https://amzn.to/3fTRpLR

Add2PSU (QTY 1):
https://amzn.to/39s4URY

Power Switch (QTY 1):  
https://amzn.to/3ljmNVk


WINDOWS 10 – DISABLE WINDOWS DEFENDER THROUGH GPOs

I cannot stand Windows Defender. Constantly destroys my crypto wallets. Here is the latest way to shut it down and disable it

In the Type here to search field
Type
gpedit.msc
Click Enter
Group Policy Editor will open

Navigate to
Computer Configuration > Administrative Templates > Windows Components > Microsoft Defender Antivirus
Open Turn off Microsoft Defender Antivirus
Set to Enabled
Click Ok

Select the Real-time Protection folder
Open Turn off real-time protection
Set to Enabled
Click Ok
Select Turn on behavior monitoring
Set to Disabled
Click Ok
Open Monitor file and program activity on your computer
Set to Disabled
Click Ok
Open Turn on process scanning whenever real-time protection is ….
Set to Disabled
Click Ok

Restart your computer…..And reinstall your wallet that was just destroyed by Microsoft’s disgusting practices.

CREATING A LOCAL MSSQL SERVER ON YOUR W10 PC

From time to time you will need to utilize a local sql server, for dev, testing, education, whatever. So here is a quick how-to on creating a local mssql server on your W10 pc.

Download and install the free version of SQL, called SQL Express:
https://www.microsoft.com/en-us/sql-server/sql-server-downloads
Accept all the defaults, except for these few
Use your credentials when prompted
Select all packages to be installed

Once SQL Express is installed, download and install SQL Server Management Studio
https://aka.ms/ssmsfullsetup

Now you have both installed, open SQL Server Management Studio or SSMS for short, and connect to your local SQL Express Database
Connect to “localhost\sqlexpress
You dont have to put in any credentials if you selected to use your credentials earlier.

To do a test on the database, try restoring the AdventureWorksDW database
Right click on Databases
Select Restore database
Select the AdventureWorksDW file
Click Ok

You can now connect into your database using Power BI or another tool, and start playing around.

Thanks for reading

WINDOWS 10 VM DISK INTEGRITY


This is a quick way to check the integrity of the local disk of a Windows 10 VM, that sits on an ESXi 6.7 Host

Go to the Type here to search box
Type cmd
Best Match will show Command Prompt
Select Run as administrator
Type in chkdsk C: /f /r /x

Check disk will now run and scan your system. If any errors come up, you will be notified, and can choose a course of action.

REMOTE SUPPORT THROUGH CHROME REMOTE DESKTOP

Teamviewer has been a constant headache in 2020. So I have had to find a teamviewer replacement…and have found Chrome Remote Desktop. So far my experience has been good. Quick, easy install. I can still remotely manage my mining rigs. This guide shows how I connect to a system that runs during the day for a dedicated user (who owns it), and mines at night. When he has an issue, he contacts me and we setup a Chrome Remote Desktop support session using the following excerpt from this link https://support.google.com/chrome/answer/1649523?co=GENIE.Platform%3DDesktop&hl=en

Share your computer with someone else

You can give others remote access to your computer. They’ll have full access to your apps, files, emails, documents and history.

  1. On your computer, open Chrome.
  2. In the address bar at the top, type remotedesktop.google.com/support, and press Enter.
  3. Under “Get Support, “ click Download Download page.
  4. Follow the onscreen directions to download and install Chrome Remote Desktop.
  5. Under “Get Support,” select Generate Code.  
  6. Copy the code and send to the person you want to have access to your computer.
  7. When that person enters your access code on the site, you will see a dialog with their e-mail address. Select Share to allow them full access to your computer.
  8. To end a sharing session, click Stop Sharing.

The access code will only work one time. If you are sharing your computer, you will be asked to confirm that you want to continue to share your computer every 30 minutes.