RUN DEEPSEEK LOCALLY USING OLLAMA AND DOCKER
To begin, make sure you set up your system properly. You can do so using this link:
https://tacticalware.com/running-ollama-on-ubuntu-24-04-with-nvidia-gpu/
Next once it is setup, you will be able to download the following models by running the command below it in bold:
DeepSeek-R1
ollama pull deepseek-r1:671b
DeepSeek-R1-Distill-Qwen-1.5B
ollama pull deepseek-r1:1.5b
DeepSeek-R1-Distill-Qwen-7B
ollama pull deepseek-r1:7b
DeepSeek-R1-Distill-Llama-8B
ollama pull deepseek-r1:8b
DeepSeek-R1-Distill-Qwen-14B
ollama pull deepseek-r1:14b
DeepSeek-R1-Distill-Qwen-32B
ollama pull deepseek-r1:32b
DeepSeek-R1-Distill-Llama-70B
ollama pull deepseek-r1:70b
Once you have downloaded and are running the model, Navigate to the web page and then select the model as shown below:
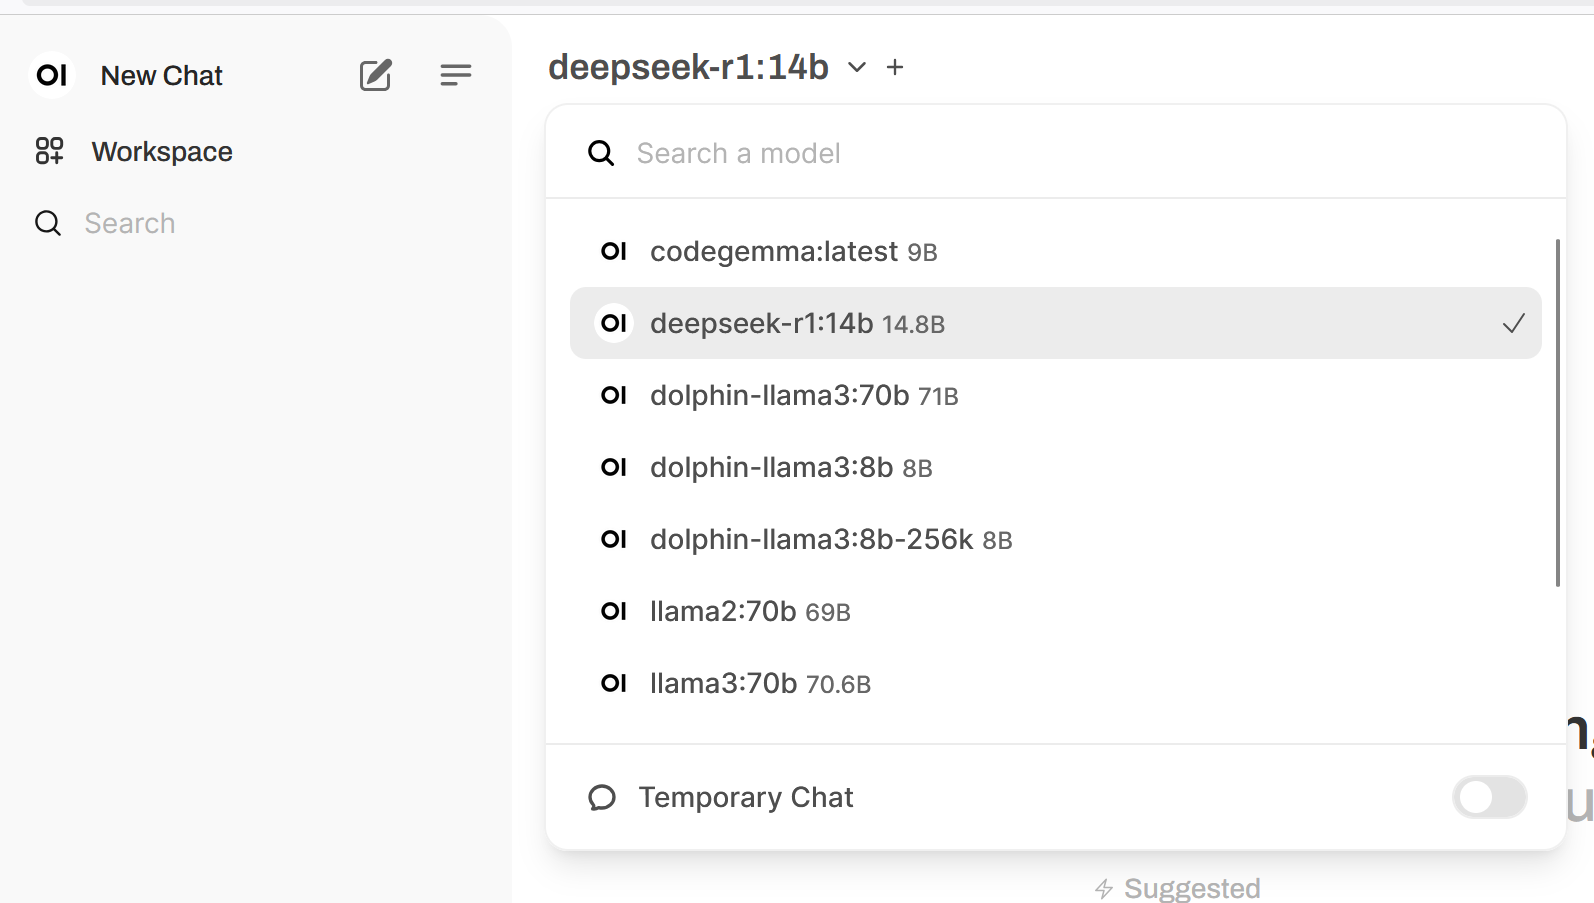
And that is it. You can run it locally now