ANTI-SURVEILLANCE / COUNTERSURVEILLANCE / ANTI-PAPPARAZZI / CLOTHING
The simple lack of Privacy is becoming more and more prevalent these days. In looking for technologies that would skew unwanted photographs, I was able to find some info on the web, yet i was unable to purchase any products that actually did it. So I threw together some of my own COVID masks, with the pieces and parts added to them. Below you will find a few pictures of what I did.
I use bandannas as face coverings during the pandemic. While I will use an N95 mask, I will overlay it with your regular bandanna for that second (now CDC recommended) layer of protection.
I had decided to put the anti-surveillance tech to use on these bandannas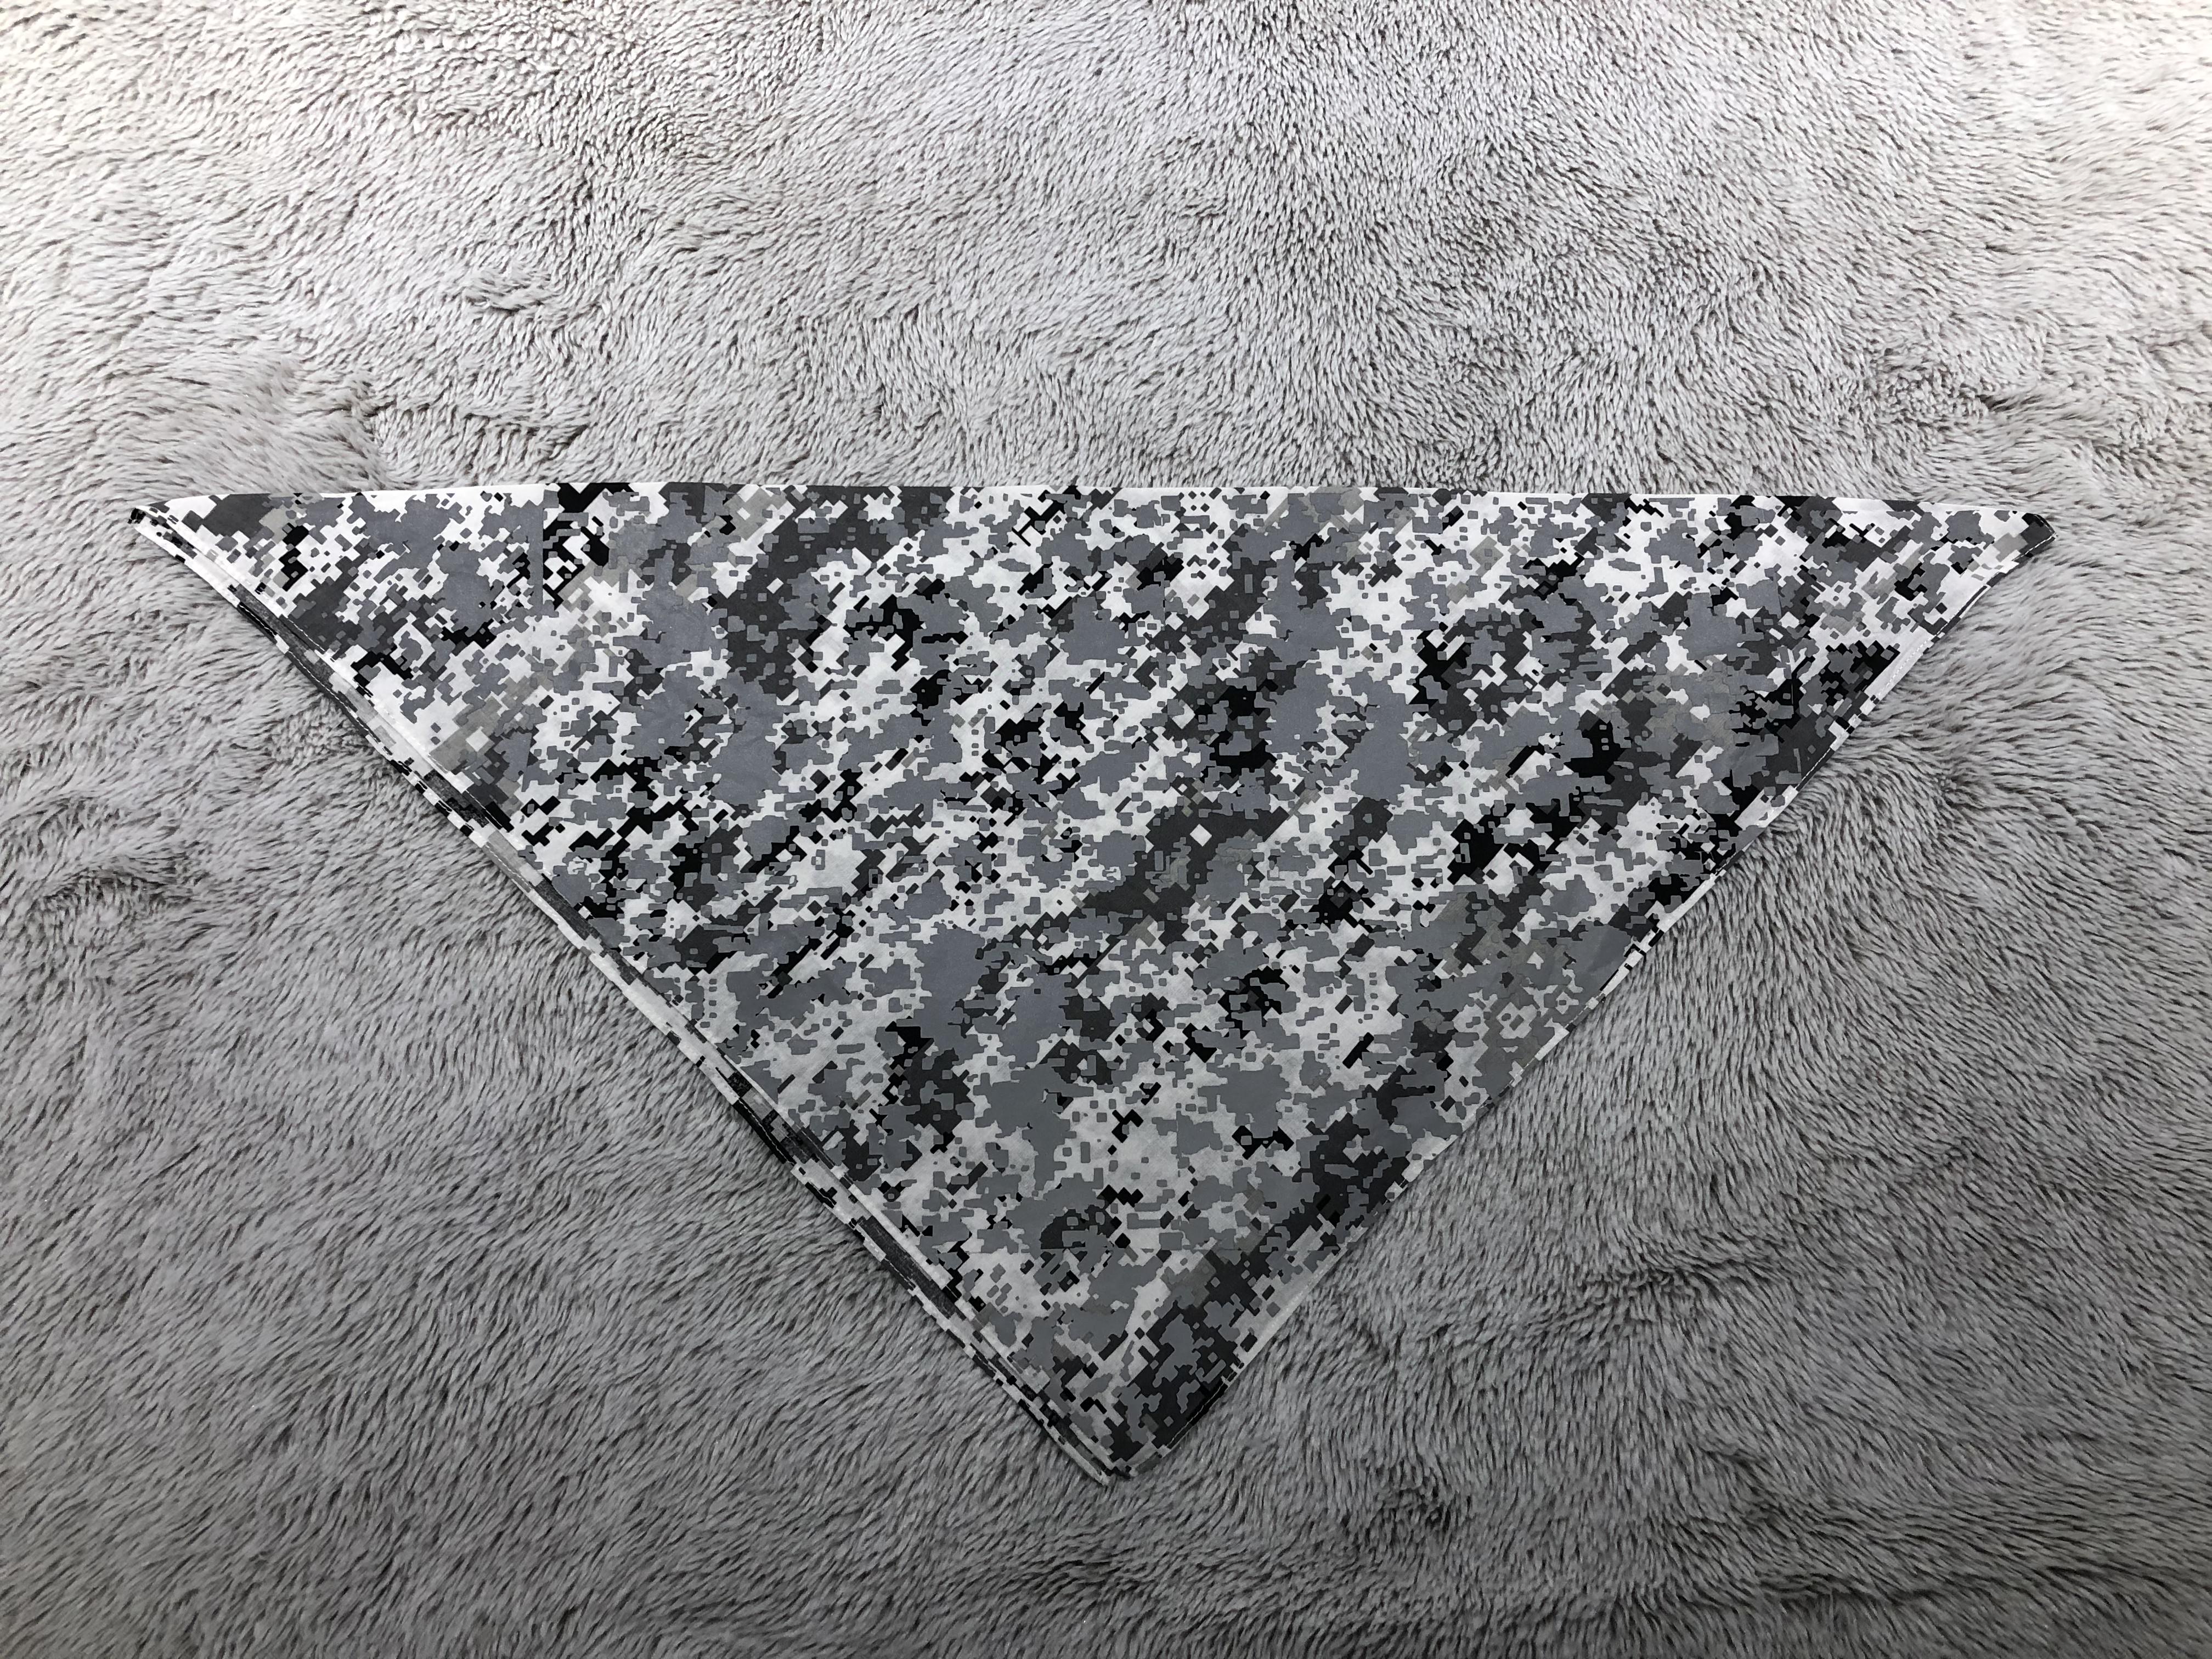

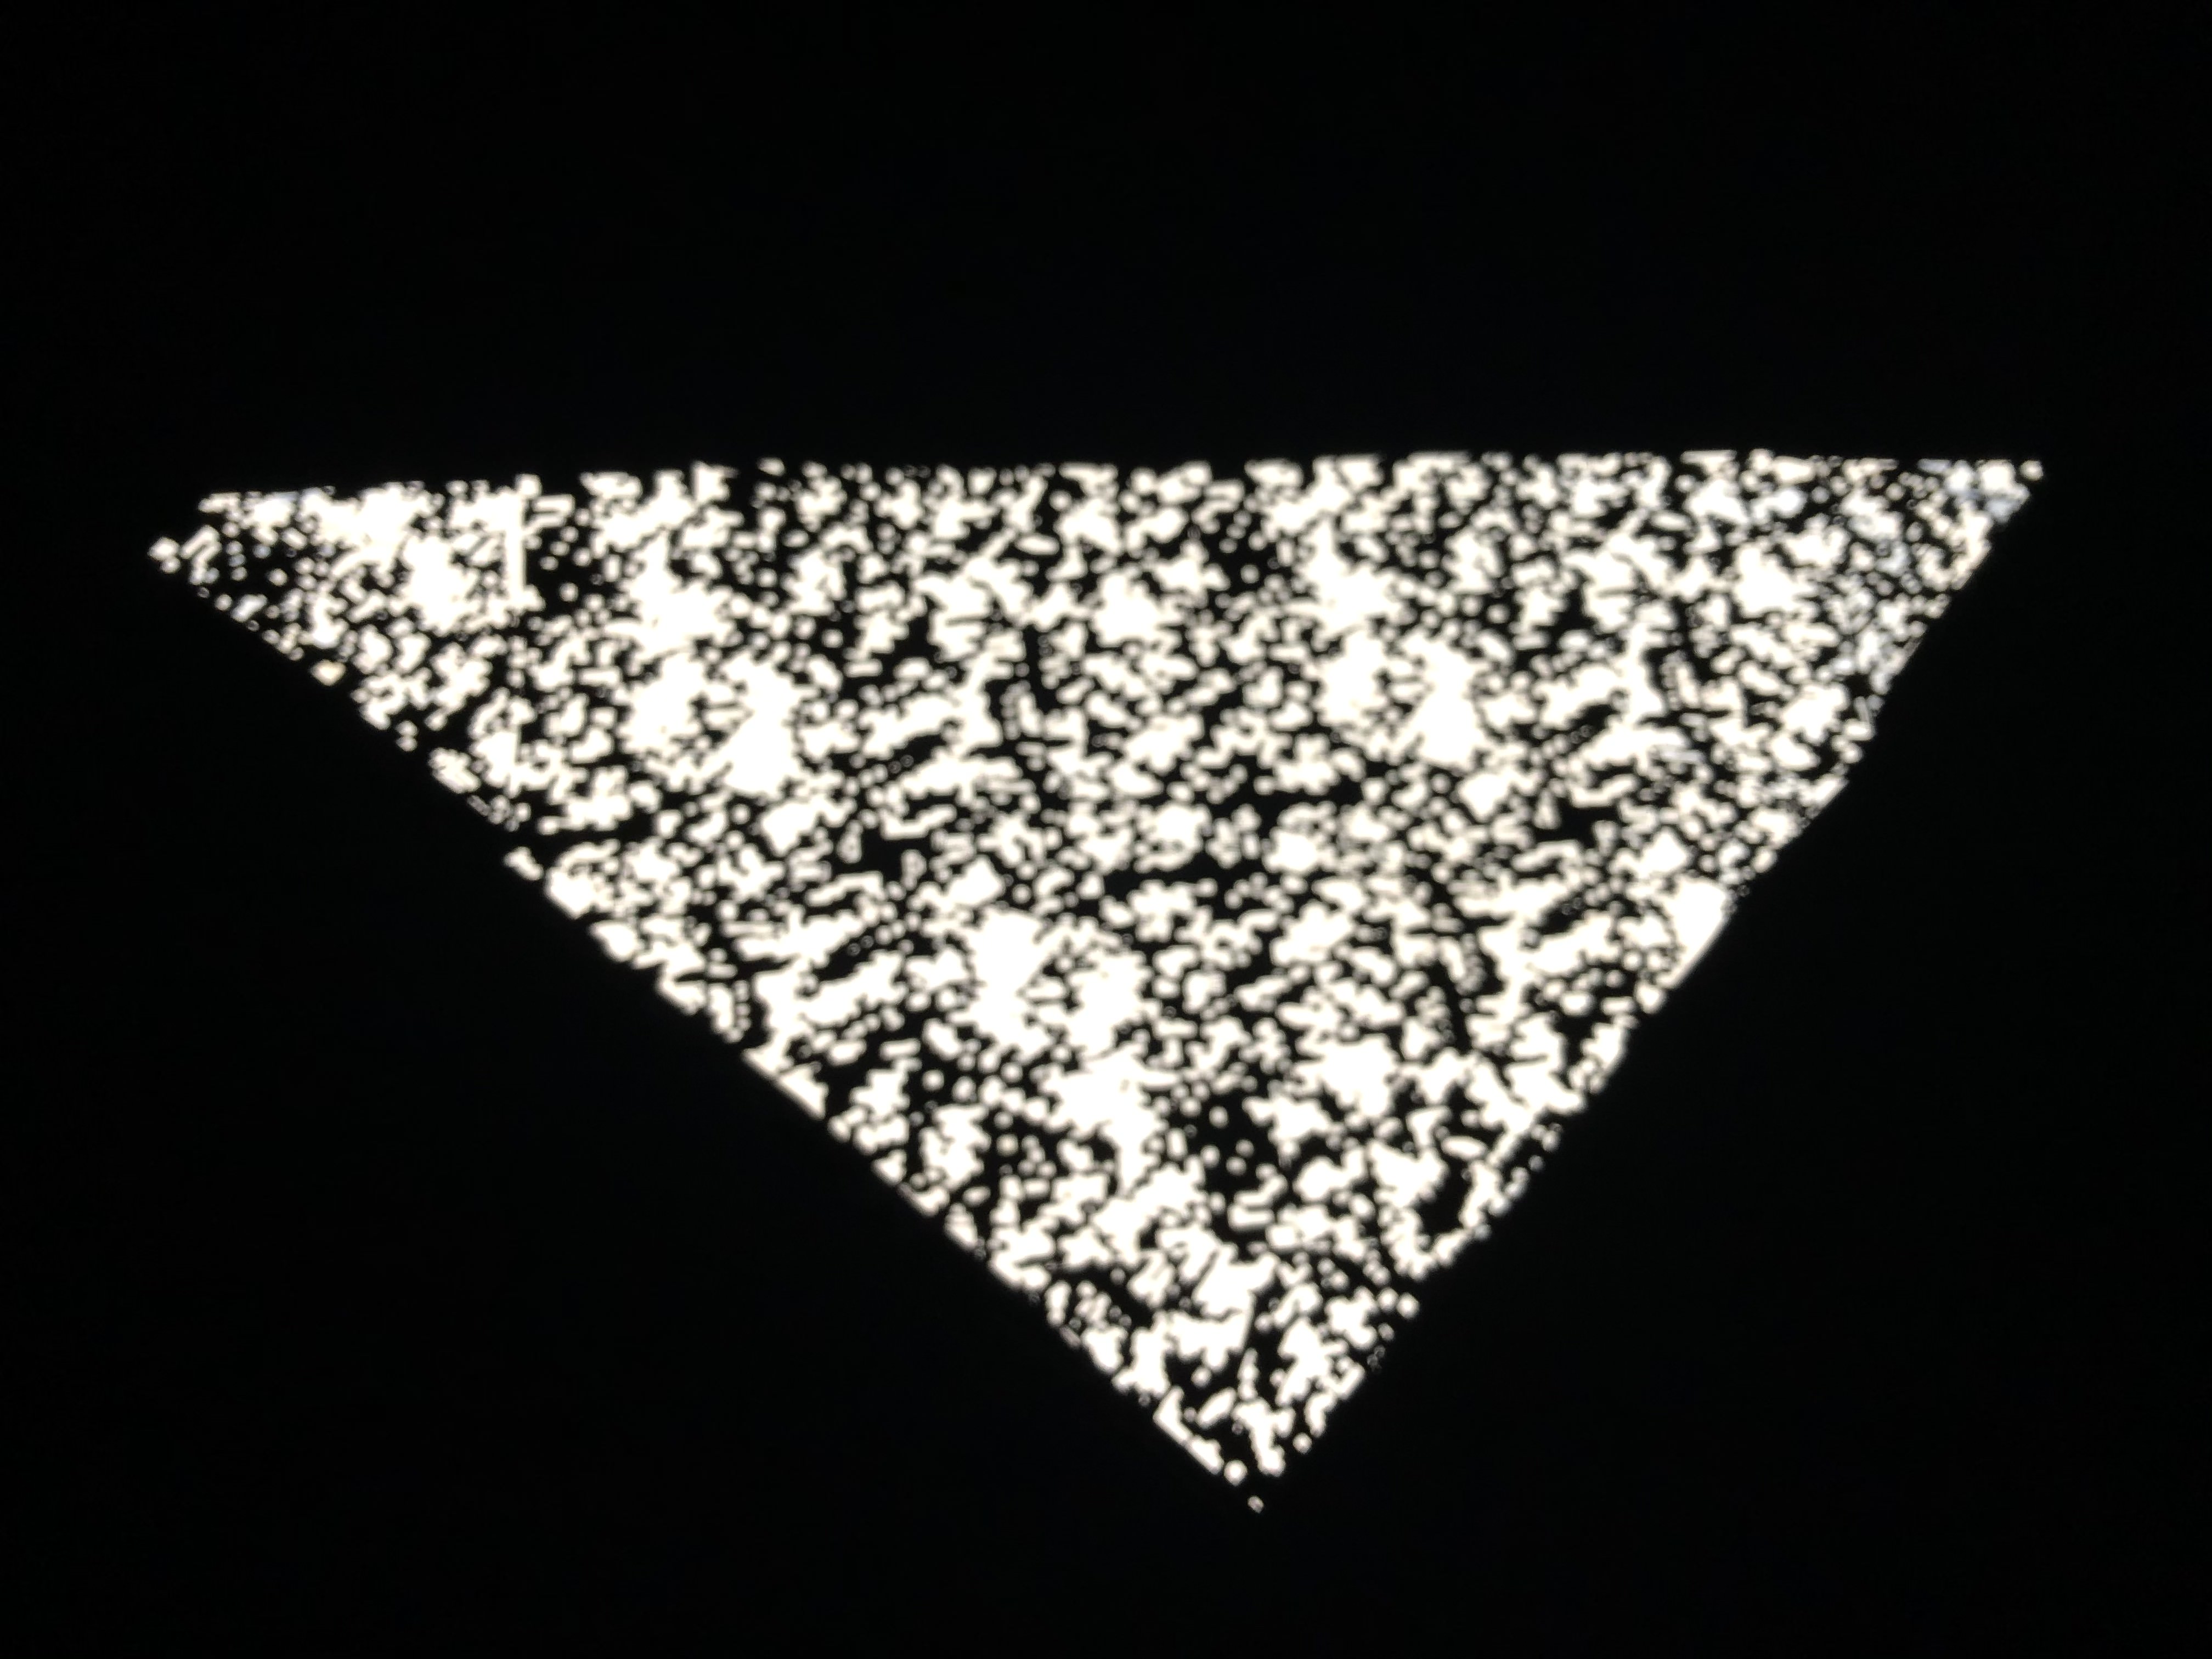
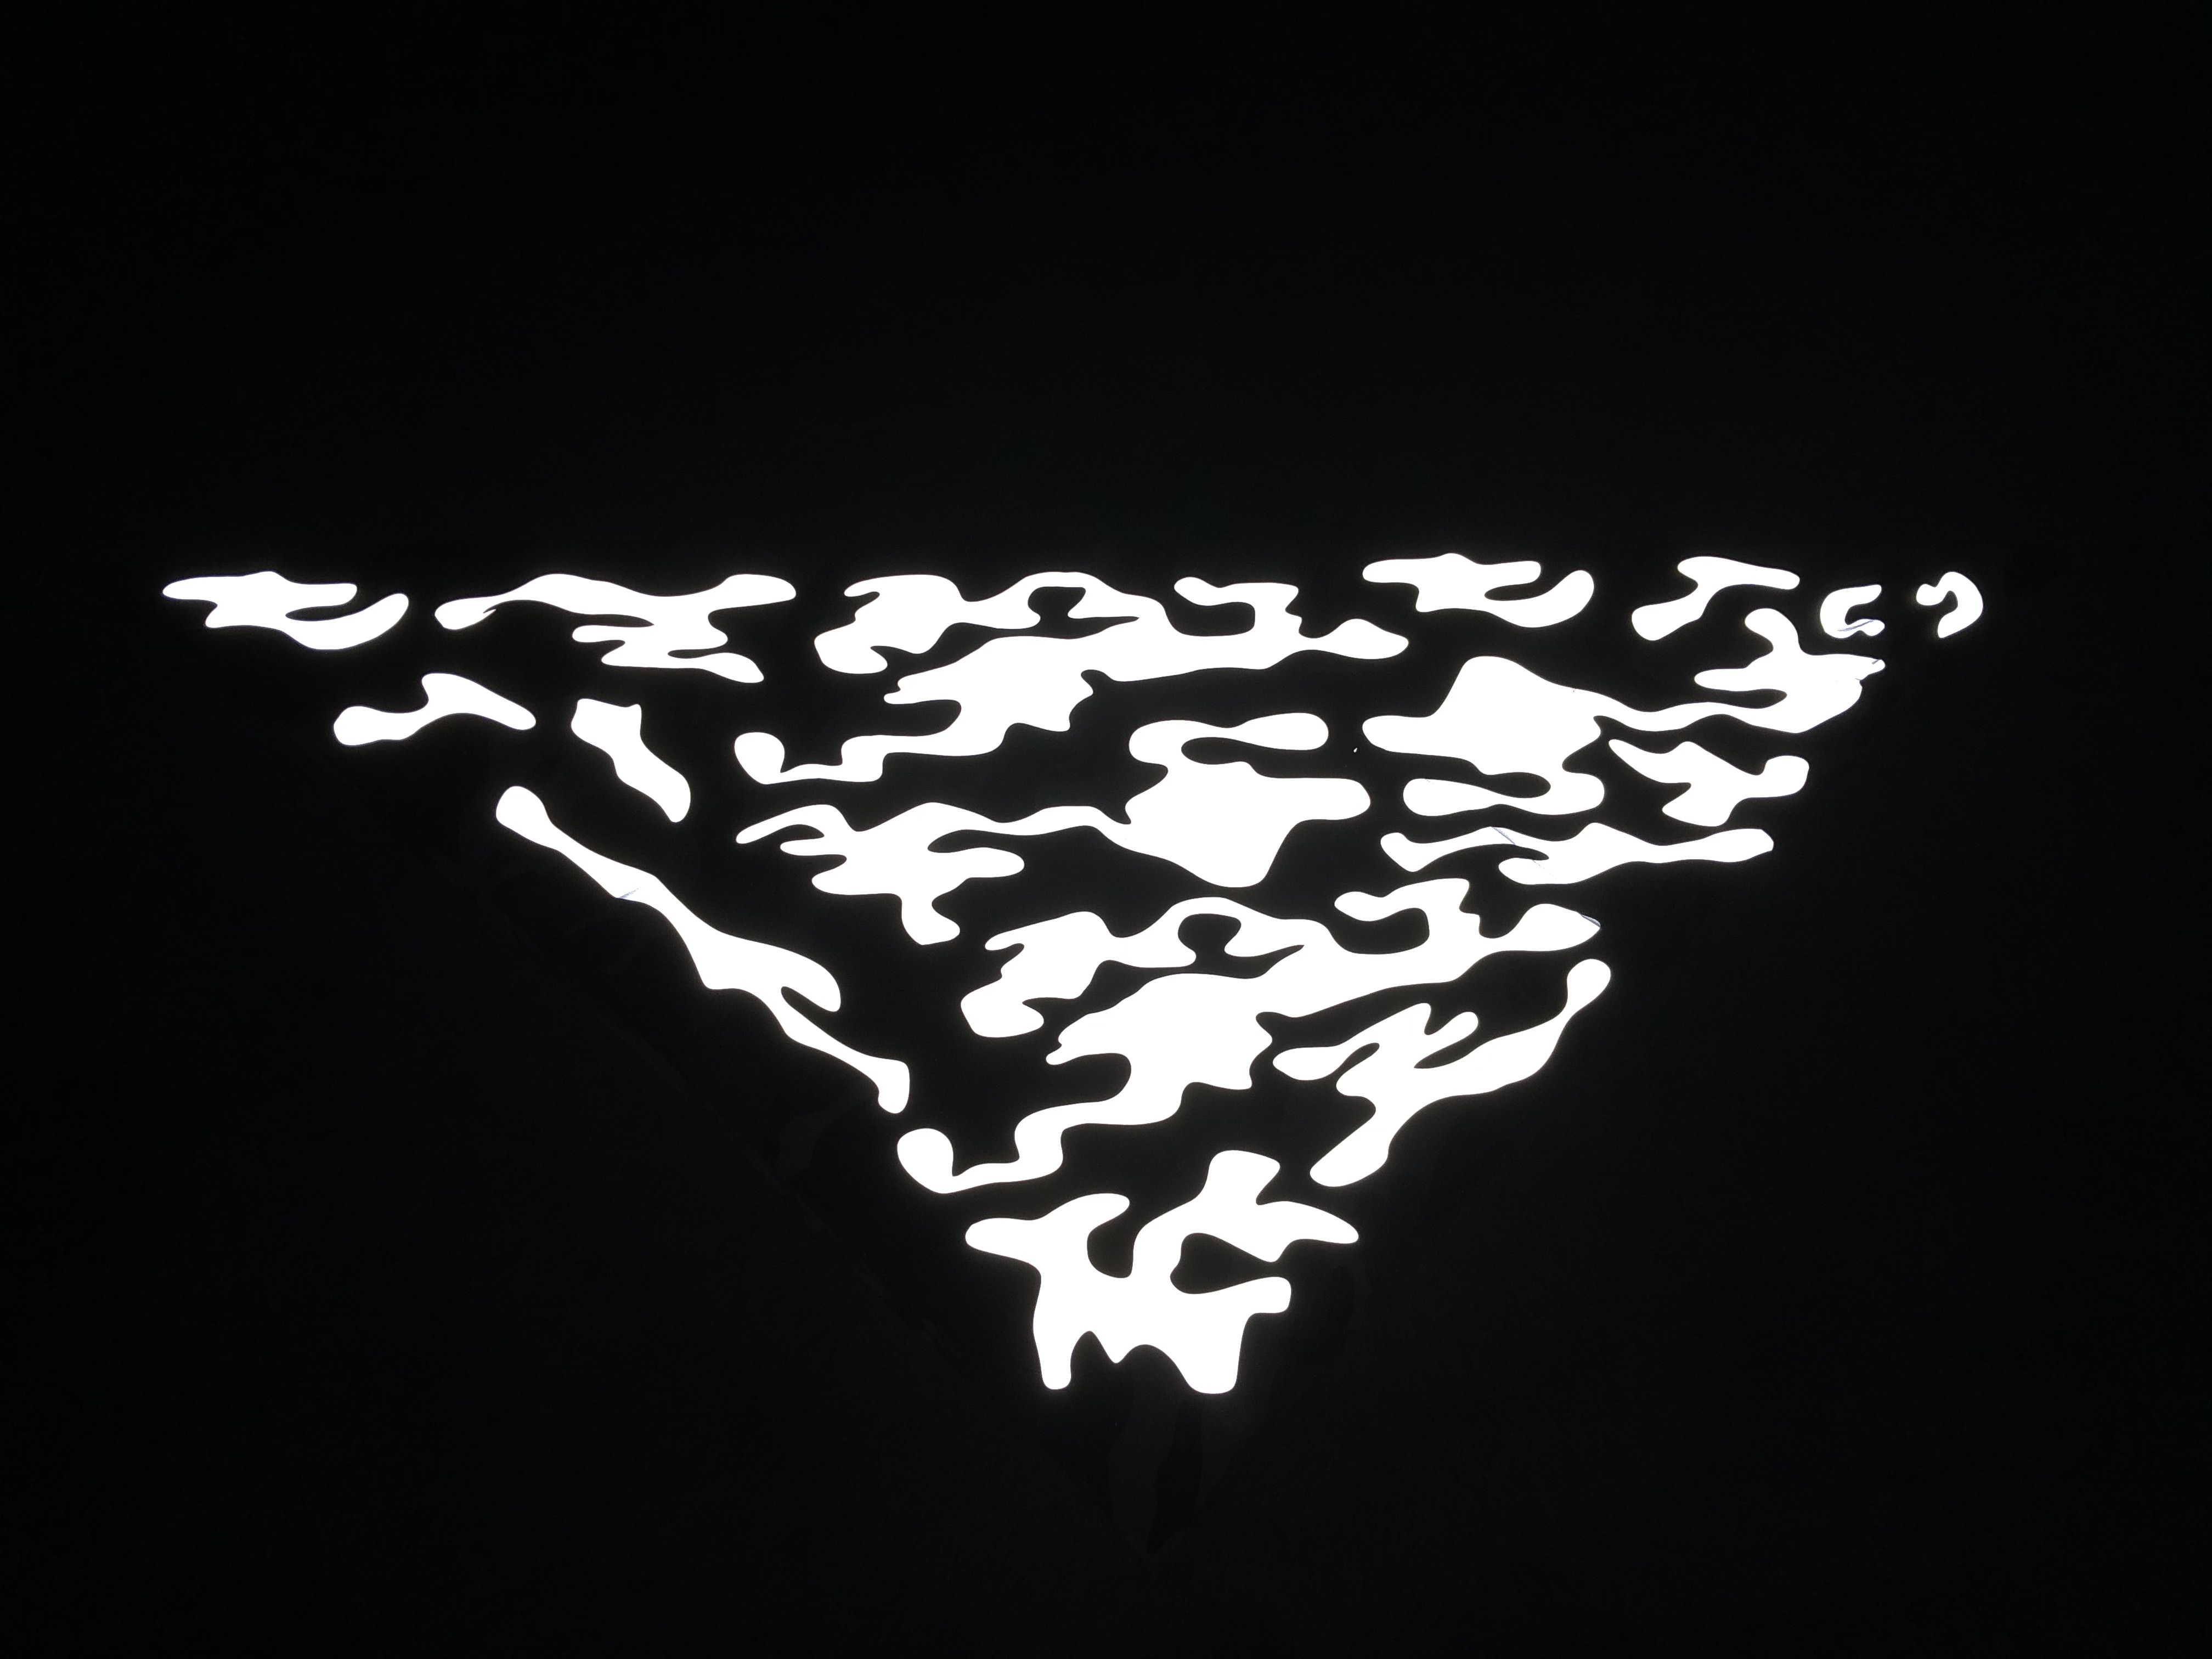
As you can see from above, I started with the regular camo bandanna, and overlayed a pattern on top of them in this grey material. The grey pattern is the countersurveillance system.
When a photo is taken of these bandannas, and the flash is used (daytime or night time) the photo is blacked out, and the grey areas are now extraordinarily white, as you can see below. These photos were taken in the same light, of the same bandannas, using the same iphone camera. The only difference is the flash was now enabled, as is with most cameras.
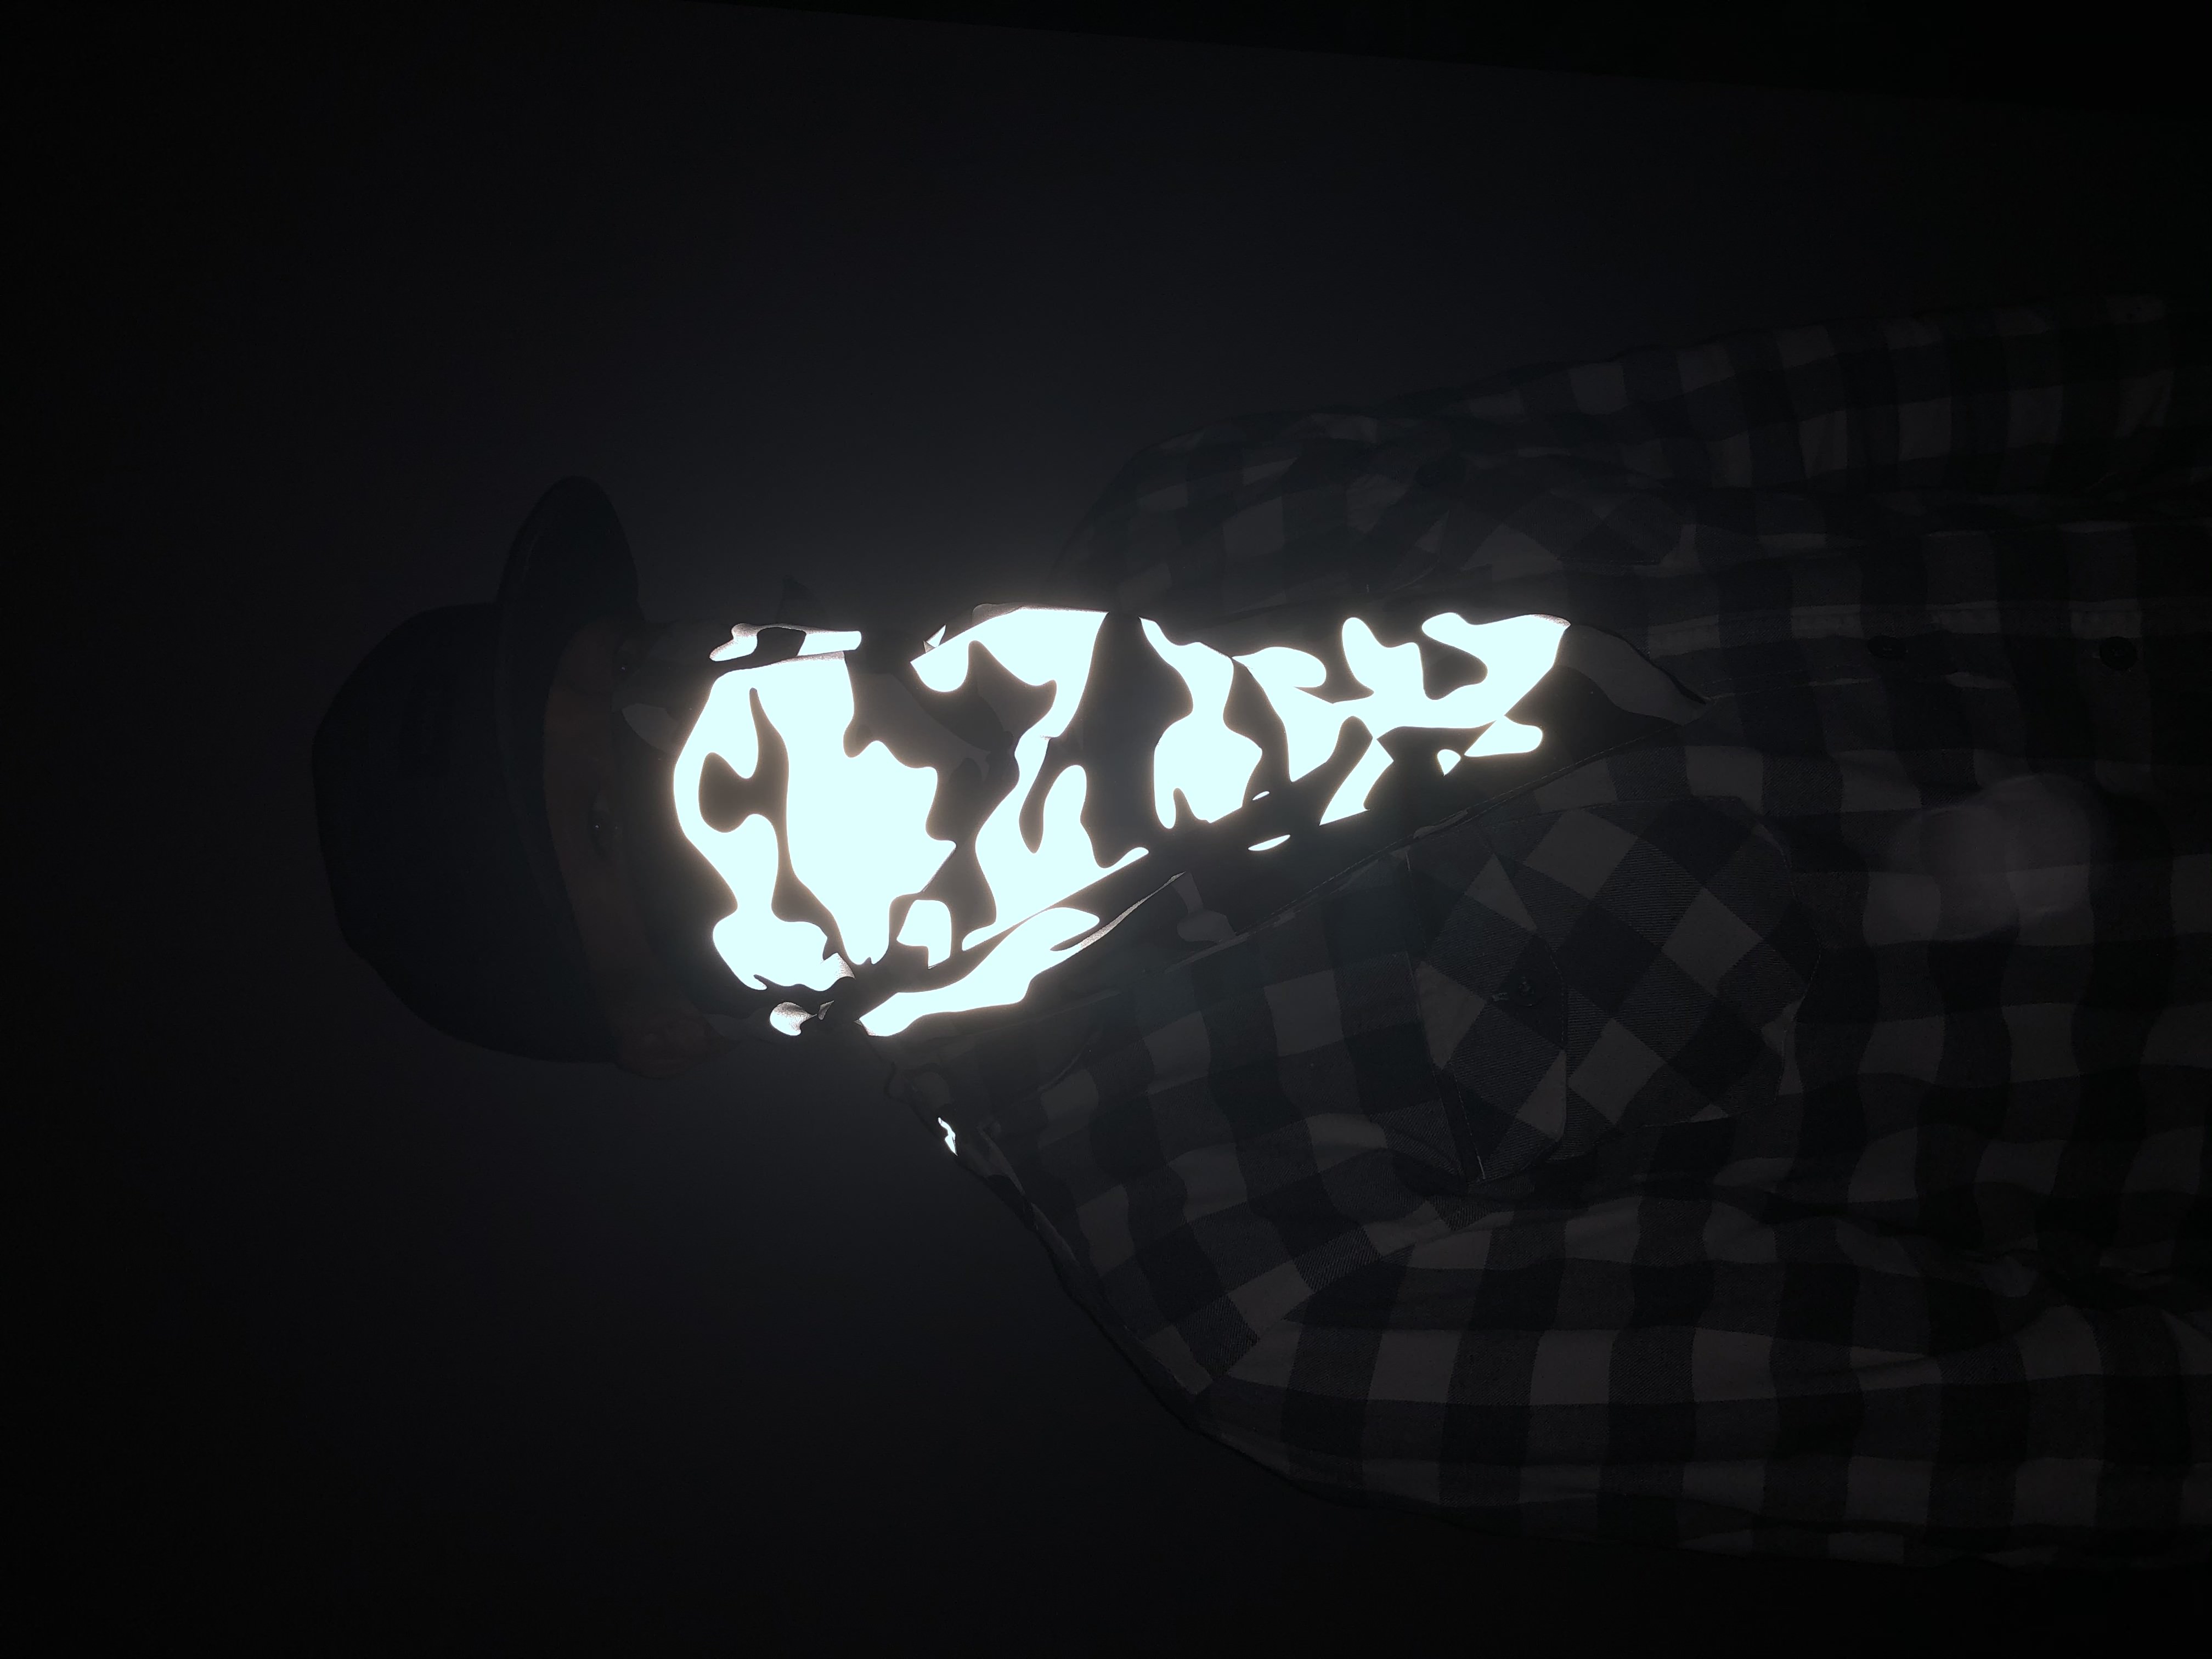
And finally here are some pictures of me, wearing it, and having a photo taken with the iphone camera’s flash on.
If you have any interest in having some of these made for you, feel free to drop me a line at tacticalwaredotcom@gmail.com