{FIXED} VIRTUALMIN PROFTPD ERROR AFTER UPGRADE TO UBUNTU 22.04
If you are receiving the following error after the upgrade:
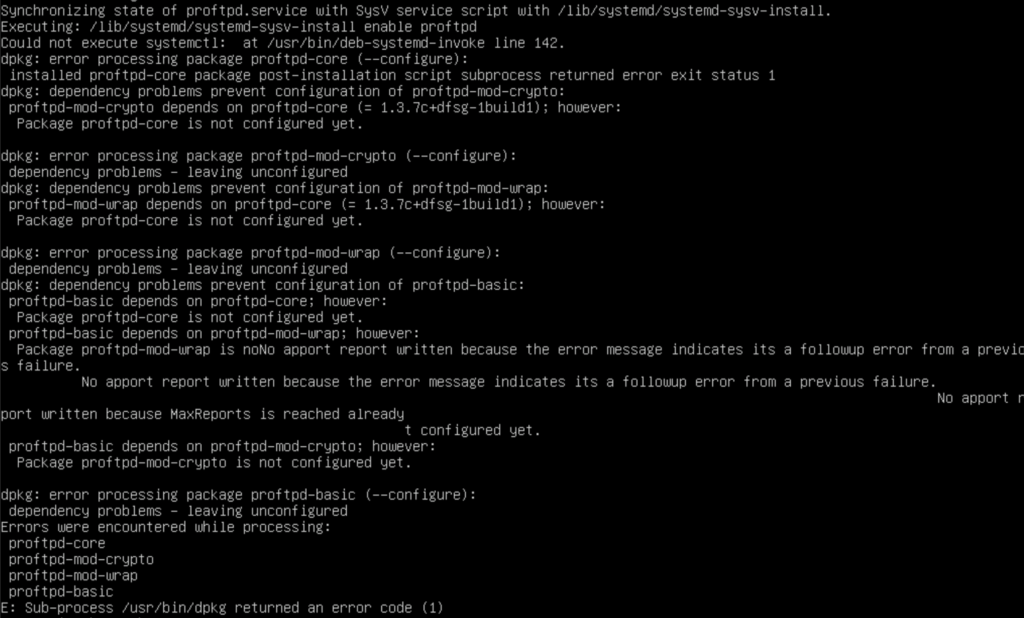
Then you must do the following
sudo apt remove proftpd*
sudo apt purge proftpd*
Now you can run updates normally
sudo apt-get update
sudo apt-get upgrade
and you will not see the error anymore
And with that, you are welcome